When we designed Contact Info, we considered that different users may have their own ideas about the contact page layout, so we only kept the basic horizontal and vertical contact icon layouts, without fully designing a ready-to-use contact template.
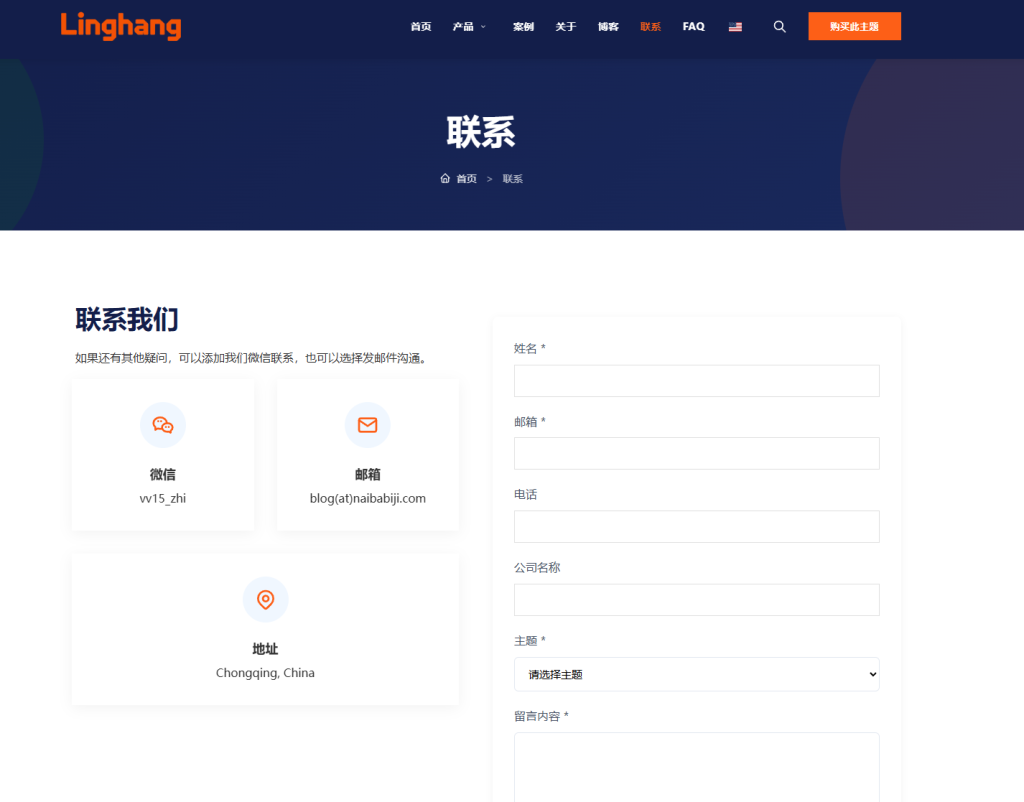
If you want to create a contact page following the design shown in the screenshot below, please follow the steps below.
Steps:
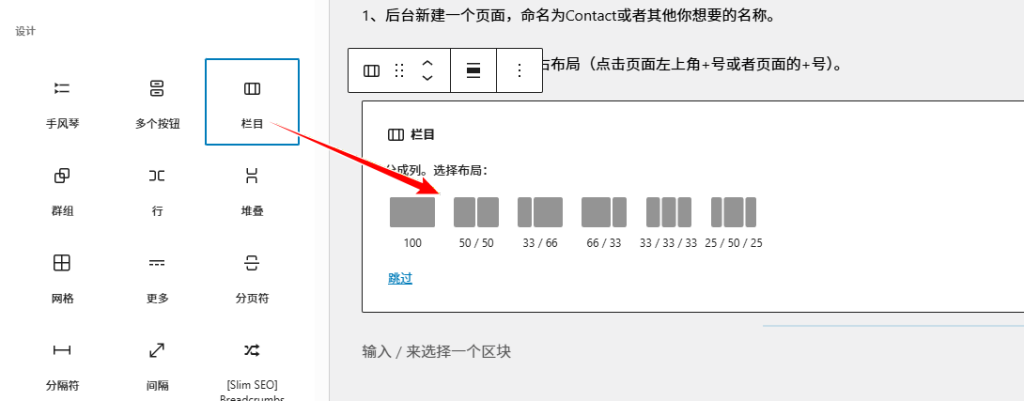
1. Create a new page in the backend, name it Contact or any other name you prefer.
2. Create a column block and select the left-right layout (click the + icon at the top left of the page or the + icon on the page).
3. After creation, click the + icon in the left column, create a heading block, write the title „Contact Us“, then press Enter.
4. After pressing Enter on the heading, the default is a paragraph. You can directly enter descriptive text. After entering, press Enter again.
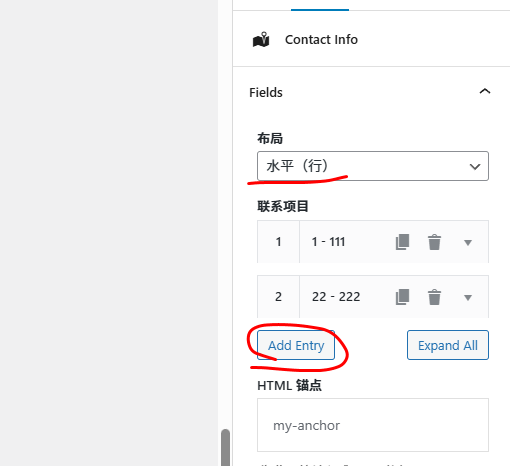
5. After the description content, press Enter, click the + icon to add a Contact Info block, click Add Entry to add contact information. You can choose horizontal or vertical layout.
6. Then click the right column, click the + icon, and add a Shortcode block.
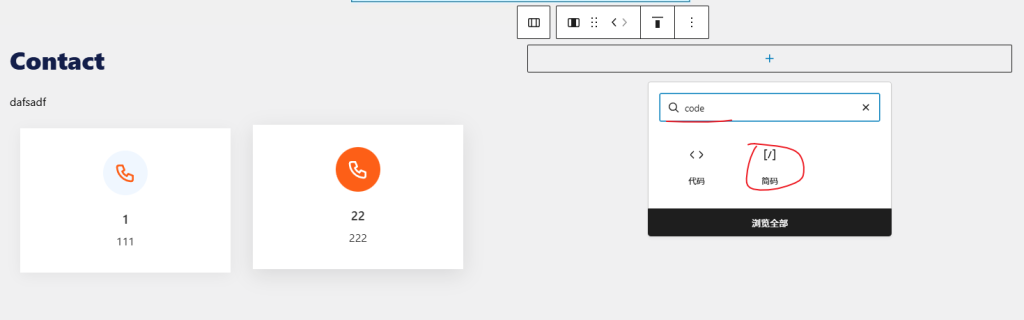
7. In the shortcode field, enter the shortcode of your inquiry plugin (if not installed, go to the backend plugins section to search for a form plugin, install it, then copy the shortcode and paste it here.
If you also want the contact icons on the left to stay fixed at the top when scrolling the page, you need to manually create custom CSS code. Beginners may not know how to add it, so you can directly contact customer service for assistance.